
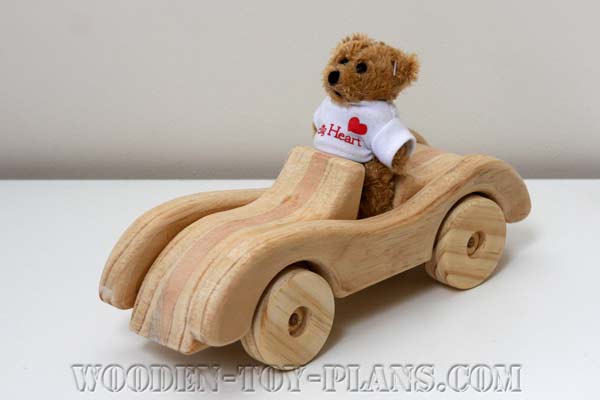
Simple, smart and stylish wooden car designs. Simple and easy to make scroll saw project, ideal for beginners and a relaxing project for experienced woodworkers.
Tools
Tools are an essential part of working with wood, and having the right tools can make a difference in how much you enjoy the hobby of making wooden toys and other woodworking projects.
To make this wooden toy car, I used a scroll saw. You could also use a band saw if you have one. If you have the patience and determination, you could even make this toy with a fret saw.
To cut the wheel arches, I used a modified fly cutter. This also gives me a set of wheels. More about this is Step xx.
You may prefer to use a set of standard wheels bought from any number of suppliers.
A drill press is recommended for accuracy and if you are going to be using a fly cutter. I make my wheels with an electric drill mounted in a drill stand.
I find a B&D Workmate is another useful tool, and I made my own workbench.
The short answer: cut 4 pieces 230mm long x 90mm wide x 19mm thick.
For this project, I used some rescued Jelutong wood. It is quite soft compared to most other wood types, ideal for carving and it’s a joy to cut with a scroll saw, especially if you are a beginner scroll saw-er like me.
Most of the time I use Pine wood for making my toys, and sometimes I find a piece of exotic wood (IE not pine.)
Most of the toys I make are basically prototypes or proof of concept, generally for the joy of making toys and to make the photographs for these instructions.
So, use whatever you have, and as far as I am concerned, Pine is fine.
Step by Step instructions
Step 1
Glue two of the pieces you have cut out together. This will become the body.
I like to cut out the fender shape in one piece, so to do this, I make a paper sandwich.
Step 2

The photo shows the paper sandwich fender part and the wheel making step, all in one go.
Much easier to show you a photo than to try to describe it. If you’re a bloke, its more than likely to ignore the instructions anyway.
Notice how I have clamped the work-piece with a backing board. If you have a drill press, I recommend the slowest speed setting, otherwise the fly cutter gets really hot and will burn the wood.
It is also important to pre-drill the holes for the axles. This fly cutter will only cut through half way, so you are going to have to turn the piece around and drill from the other side.
This step is essentially like making your own wheels. Some people would use a hole saw instead, and that is fine. One thing to remember is that the hole saw diameters are measured for the holes they make, so be aware that the wheel will come out slightly smaller.
Another thing about making wheels with a hole saw is to allow the sawdust to escape. One way to do this is to cut the hole close enough to the edge.
Step 3
Cutting out the fender shape on the scroll saw or band saw is quite straightforward. No fancy tricks here.
However, to make the body shape, there is an internal shape to cut out. Impossible on the band saw, and quite awkward on an entry level scroll saw like mine.
So, what I suggest is to make a relief cut on the underside of the bodywork, where it is less noticeable.
Step 4

Test fit the pieces. The wheels are held in place with the dowels to check how the wheel arches fit. All looks good at this stage.
Now I am going to round over all the edges. For the fenders, I shall be rounding over the outer edges a bit more that in inside edges, so I make a pencil mark on each of the inside faces.
Final assembly
Once all the edges are rounded over, it’s time to glue everything together. I use wood glue, and to stop the pieces from moving under clamping pressure, I like to use wooden dowels.
Here I decided to try something different: metal dowels in the form of small one inch nails, driven into one side, cut the heads off and sharpen with a metal file.
Allow about 6mm or so of the nail sticking out. With the wheels in place, apply the glue and firmly push the fender in place, keeping an eye on the gap around the wheel arches. Do the same with the other side.
Remove the wheels, and clamp the assembly, wiping off excess glue.
Here I have stained the fenders a dark mahogany colour.
Download wooden car designs
Download the full size templates Wooden Car Designs at no charge.
More free wooden Car Designs
Racing toy car plans link to free download.
Make this delightful toy racing car using only hand tools and bits of wood from your scrap bin.
Print ready PDF full size patterns with step by step instructions with photos.
Price: Free
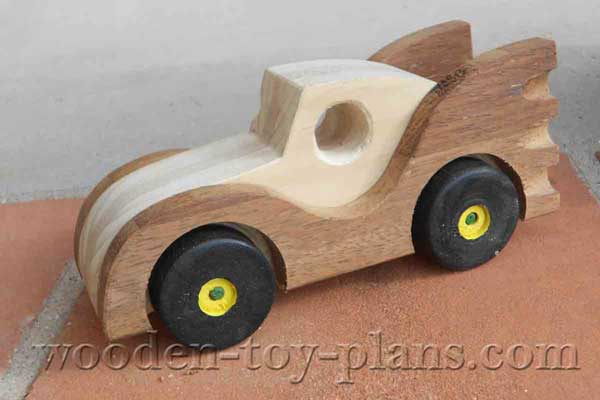
The Batmobile has similar construction method as the racing car.
The addition of rocket power makes this car hard to beat.
Price: Free

This free wooden toy car plan is inspired by the coupe from the 1930's, this roadster is fun to build.
Print ready PDF step by step instructions with photos are also available.
Price: Free
Keep in touch
Follow me on social media, or subscribe to my (occasional) newsletter. I only publish if I have new wooden toy plans to share.
Original article and pictures take https://www.wooden-toy-plans.com/wooden-car-designs.html site
Комментариев нет:
Отправить комментарий